Being able to use external DLLs in Dynamics CRM plugins is challenging but doable. Most people who have been doing development on the Dynamics CRM platform for any period of time know that it is not enough to simply reference the DLLs in Visual Studio - you must somehow make them available to run on the server - this can range from mildly annoying to impossible (if you using CRM Online.)
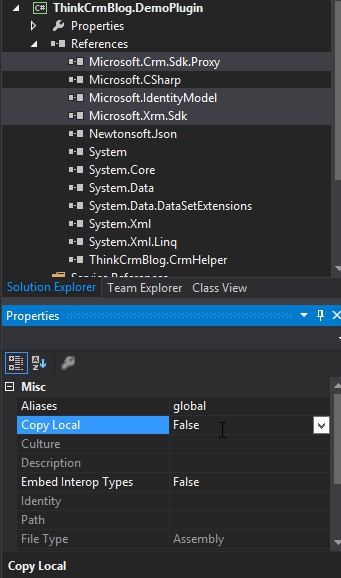
You can read the Dynamics CRM Blog article by Michael Scott for more details, but here is the jist (the same rules apply to 2013/2015): You may have noticed that Microsoft Dynamics CRM 2011 (and CRM 4 before it) does not really have support for referencing custom assemblies from a plug-in assembly. You are limited to .NET Framework assemblies and the public Microsoft Dynamics CRM 2011 Software Development Kit (SDK)assemblies. In Microsoft Visual Studio, your references will look something like this:
If you wanted to reference an assembly that you had written, your options were pretty limited:
- Register the assembly on disk with any referenced assemblies in the same directory.
- Register the referenced assembly in the GAC
- Include the relevant source code in the plug-in assembly
With the introduction of Solutions in Microsoft Dynamics CRM 2011, the first two options are not very manageable (as they require special setup on multiple servers during the installation of the solution">PICTURE REMOVED]
If you wanted to reference an assembly that you had written, your options were pretty limited:
- Register the assembly on disk with any referenced assemblies in the same directory.
- Register the referenced assembly in the GAC
- Include the relevant source code in the plug-in assembly
With the introduction of Solutions in Microsoft Dynamics CRM 2011, the first two options are not very manageable
. In addition, those options don’t work in Microsoft Dynamics CRM Online, since assemblies must be registered in the database in CRM Online. If you include source code, as the last option suggests, then all of the benefits of a referenced assembly are lost, without gaining any real benefits. In the same article it is recommended to use ILMerge. ILMerge is a tool from Microsoft Research that can combine multiple DLLs into a single DLL - eliminating the problem (in the case of Dynamics CRM) of having multiple DLL files.
The article goes on to describe the basics of using ILMerge to create a single plugin DLL. While I have done this on many projects over the year it has always been more complicated to initially setup and maintain than I would prefer. It can also be challenging to teach new developers - many of whom are still getting comfortable with Dynamics CRM development.
I recently decided to do some research and figure out a simple and well defined set of step-by-step instructions to use ILMerge in development. In the next several steps I will describe the exact process I now use, which doesn’t involve any editing of MSBUILD files, creation of PowerShell or BAT scripts, etc. It only requires the use of Nuget and the Visual Studio GUI.
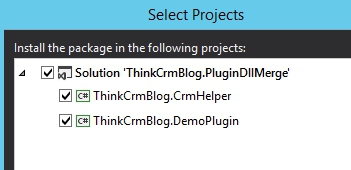
- Start by creating a new Blank Solution in Visual Studio (Other Project Types -> Video Studio Solutions.) Name it as you wish, I used ThinkCrmBlog.PluginDllMerge.
 - Now that you have a new solution add a couple of class libraries. I’ve named mine ThinkCrmBlog.CrmHelper (this is inline with my best practice of having a standalone DLL of helper classes that can be used for CRM development but are not specific to any particular CRM org and can be used in plugins, workflows, and client side code) and ThinkCrmBlog.DemoPlugin (which will hold my IPlugin class.
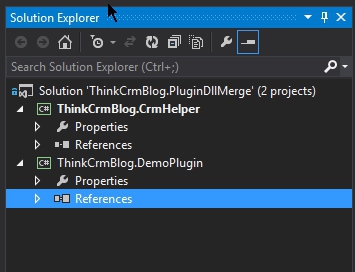
 - So now your solution should look like this picture (assuming you deleted the Class1.cs files.)
 - We’ll add the Dynamics CRM libraries using NuGet.
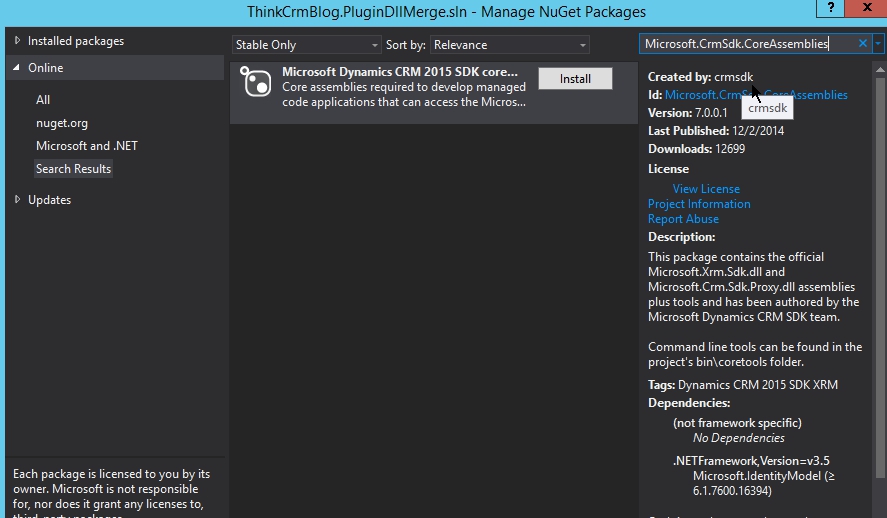
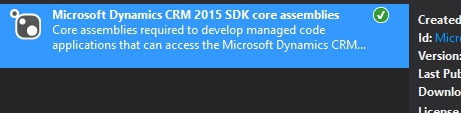
 - Search for Microsoft.CrmSdk.CoreAssemblies and install.
 - You want to install to both projects.
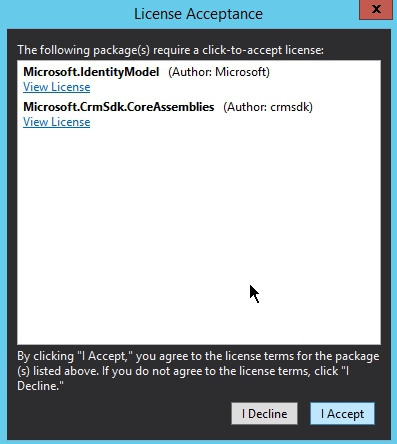
 - Using NuGet greatly simplifies some tasks by including required dependencies. In this case it is Microsoft.IdentifyModel. Although technically not required to compile a plugin DLL if you were to use the core assemblies in a client side app it is necessary and can be something of pain when you do not realize you need it until runtime.
 - You can tell that everything has succeeded by the green check.
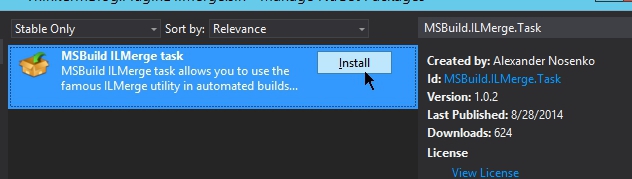
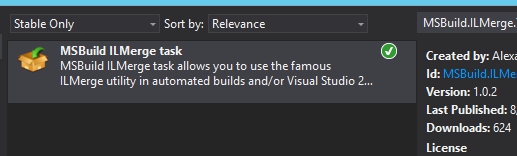
 - So now it is time to get ILMerge installed. Luckily for the modern developer we have NuGet to make this super simple. We don’t want just ILMerge, we want a tool that automates the ILMerge process into the build process. Do a search for MSBuild.ILMerge.Task and click install.
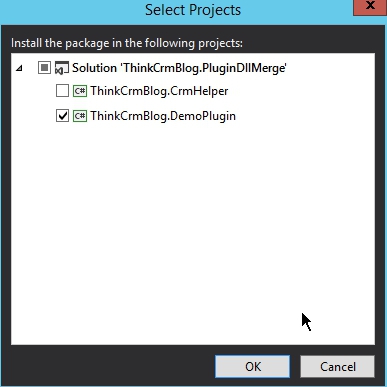
 - We only want to install to the project that will need to have DLLs merged, so uncheck the box next to ThinkCrmBlog.CrmHelper. Now, if you had more projects creating plugin DLLs that referenced ThinkCrmBlog.CrmHelper you would want to check the box for each of those projects.
 - The ILMerge application itself is available as a NuGet package and is a dependency, so it will be installed.
 - Again, the green check is your confirmation of success.
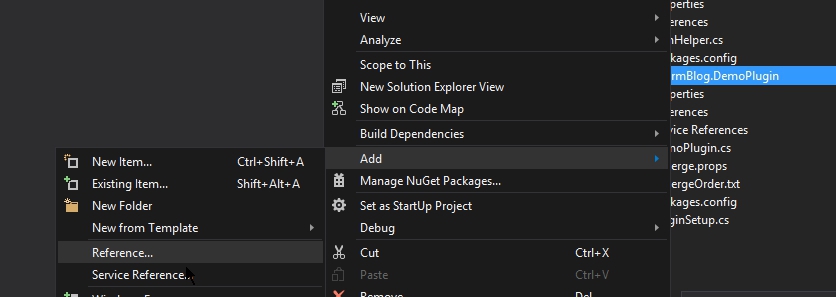
 - Now we need to add a reference to ThinkCrmBlog.CrmHelper from ThinkCrmBlog.DemoPlugin.
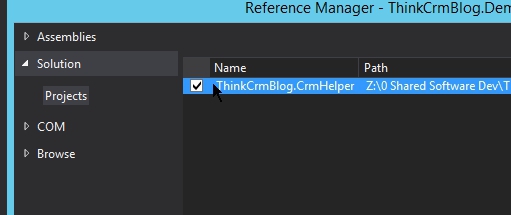
 - Just check the box.
 - Now we have to do a property update on the CRM SDK DLL files so they don’t get merged into our final DLL. The ILMerge build task we installed will merge all the DLLs in the \bin directory. To avoid merge the CRM SDK DLLs and Microsoft.IdentityModel.DLL into our plugin DLL we need to tell Visual Studio to not copy them on build. Select the three files and set the property “Copy Local” to false.
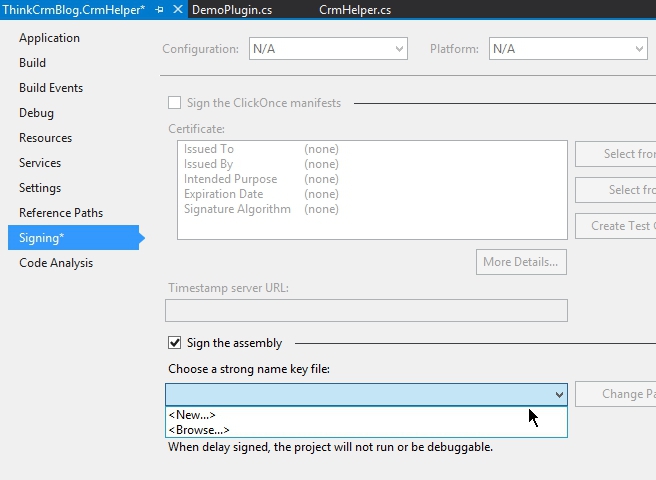
 - One last, but critical step, be sure to sign both of the projects. Dynamics CRM requires that DLLs be signed and therefore any DLLs we include must be signed.
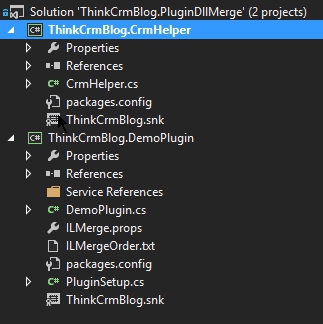
 - The solution should look similar to this picture.
 - For the source code, which I’ve placed online on GitHub @ https://github.com/nicknow/ThinkCrmBlog.PluginDllMerge, I created a very basic plugin will create an instance of a class in CrmHelper and call a method before throwing an exception to allow the user to via the trace log. This was done just for demonstration - it serves no real-world purpose. Afte writing the code I did a Clean Solution and a Rebuild Solution.
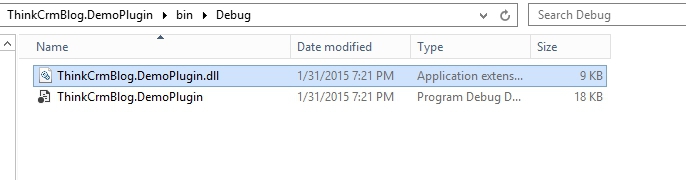
 - In the output directory you’ll see only the final DLL - the merged DLL(s) have been deleted. If you open the DLL in a decompiler, such as dotPeek, you’ll see that the DLL contains both the ThinkCrmBlog.DemoPlugin and ThinkCrmBlog.CrmHelper namespaces.
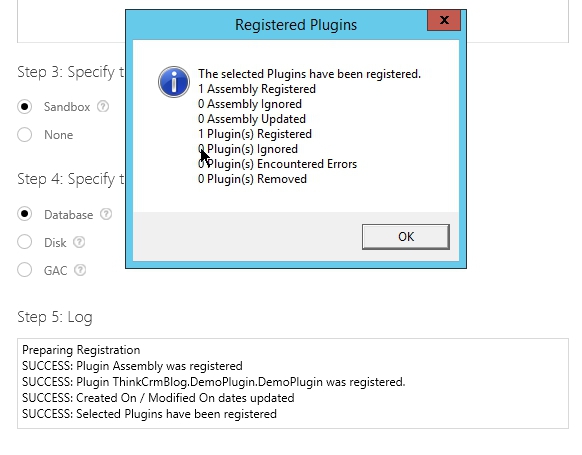
 - Install the DLL using the Plugin Registration Tool (or any other preferred tool.) You’ll see that it is a Sandbox deployment - so it will work with CRM Online.
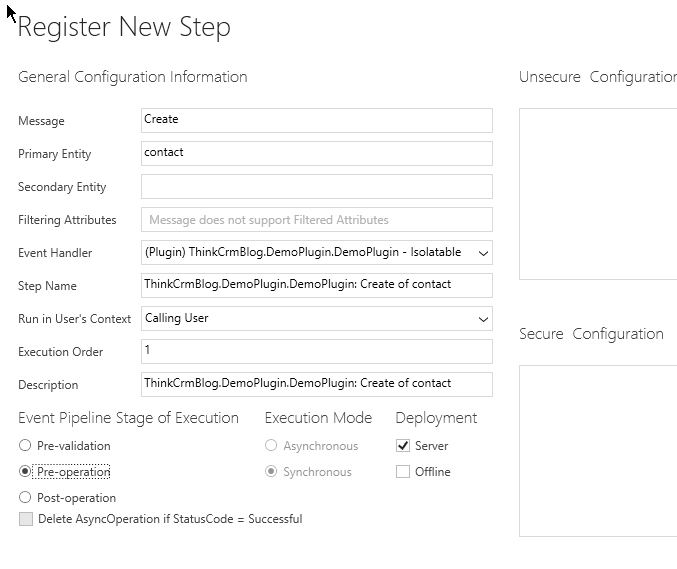
 - Register a plugin step against an entity and step, we are just testing so it doesn’t matter what entity and step. I choose create on contact.
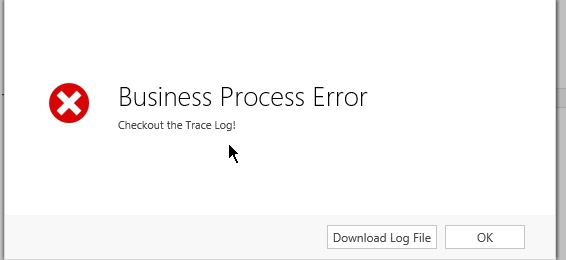
 - If I try to create a new Contact I’ll get the following error (as expected based on the code.)
 - If you click Download Log File you’ll see the following indicating that our plugin fired and successfully called CrmHelper.IsTeamMember. This confirms that our DLL merge is correctly working.
 - NOW: Be Smart - Delete that plugin if you have been following along, you don’t want it causing you an error unexpectedly down the road.
I’ve tested this with a project that contained CrmSvcUtil.exe output for early bound objects without an issue. I’ve done this with JSON.NET without an issue (except for having to user v6.0.3 or earlier if you are in Sandbox.) I’ve run this, as shown above, in Sandbox without issue.
Remember, just because you can merge DLLs doesn’t mean you don’t have any limitations. Code running in Sandbox must still adhere to the rules - no SQL calls, disk access, reflection, etc. Also, be careful that you aren’t merging so much that your plugin DLL becomes bloated causing issues with deployment or (possibly) a negative performance hit.
Try it out and let me know your experience. I’ve only been using this method for a month but it certainly beats my previous processes that involved either using a batch file or a custom build step and editing the CSPROJ file.